domingo, 26 de enero de 2025
Nuevo parche disponible
viernes, 9 de agosto de 2024
Nuevo canal de Twitch
A partir de ahora trataré de ir subiendo vídeos de mis actividades diarias relacionadas con el romhacking, por si alguien tiene curiosidad de cómo hacemos estas cosas. He abierto un canal de Twitch aquí, con varios vídeos ya:
https://www.twitch.tv/green_goblin7965
También podéis agregarme a Twitter si queréis:
Saludosjueves, 4 de marzo de 2021
Mini update
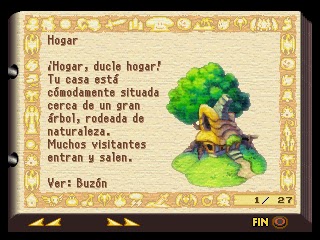
As you may or may not know, our translation was not 100% complete. There were 3 little graphics that we could not find and as a result they were left untranslated. Recently we talked to Ortew and he decided to investigate, and thanks to him we can finally say that the game is completely translated.
Download (outdated)
To apply the patch just drag the ISO onto the .bat file, that's all.
You will need the correct ISO:
- Size: 677.406.576 bytes
- CRC32: 5028946f
These are the translated graphics that were missing, in case you are interested:
Romhack: Ortew
Graphic artist: Wind Glaive
Many thanks guys!
jueves, 15 de marzo de 2018
New patch available!
To apply the patch just drag the ISO onto the .bat file, that's all.
You will need the correct ISO:
- Size: 677.406.576 bytes
- CRC32: 5028946f
Regards!
domingo, 29 de mayo de 2016
First patch published!
To apply the patch just drag the ISO onto the .bat file, that's all.
You will need the correct ISO:
- Size: 677.406.576 bytes
- CRC32: 5028946f
Enjoy.
sábado, 3 de enero de 2015
lunes, 17 de noviembre de 2014
9 - Translate the pictures (II)
http://www.romhacking.net/utilities/991/
Now open "WM1.PIM.tim" or "WM1.TIM" (they are exactly the same file)
4 BPP linear, reverse order
2-dimensional
160 x 32 tiles
Use this black and white palette:
You will see something like this:
By the way, there are some texts in the bottom left corner of this file.
Do the same thing when you open the other files (WM2.PIM.tim or WM2.TIM). You will get this file:
And that is all you need to know regarding these files.
domingo, 16 de noviembre de 2014
8 - Translate the pictures (I)
Almost all of them can be edited using Photoshop and the TIM plugin. Just use the allowed colors used by the original palletes and you won't have problems. When saving the TIM files you will have to keep the original information: BPP, CLUT section coordinates, pixel data section coordinates and number of CLUTs. All this information can be obtained opening each file with Tim2view, for instance.
These 4 files cannot be edited using Photoshop:
- WM1.PIM.tim
- WM1.TIM
- WM2.PIM.tim
- WM2.TIM
We will see how to edit them in the next episode.
7 - Update the .tbl files
US-PSX-LegendofMana-02.tbl -> This table is used when extracting the texts from the ISO, so this file must not be modified.
US-PSX-LegendofMana-01.tbl -> This table is used to insert our translation, so all the new characters that we changed before must be changed in here as well.
XX-PSX-LegendofMana-MTE.tbl -> This is the table used to insert the MTE codes. The contents of this file should match the contents of the table 01.
Now we will have to change the MTE codes. This MTE codes are stored in the font file and they are used to save space in the ISO, so let's go to the FONT folder and there we will find a littel text file called "FONT.PRS.txt". Open it and you will see the 16 English MTE codes used in the original version. We need to change all of them, and since we want to translate this game into Spanish I've decided to use the most used words in Spanish, which are these ones: de, que, no, a, la, el, es, y, en, lo, un, por, me, qué, una, te.
Each one of these words must be inside the original tags <ptr> and <End0/>. I have noticed that there is a bug in the 6th tag, it doesn't matter which word you type in there, the game simply does not recognize the word, so leave it empty and add a new pair of tags at the end of the file to be able to type the 16 most used words in Spanish. So now there are 17 tags, 16 real tags plus the empty tag.
Now we will have to modify one last file. Open the file called "LoM-Param.lua" which you will find in the main folder. At the end of the file you will see this:
NB_MTE = 16 -- Number of entries in the dictionary (MTE) - 234 should be the maximum
After the equal sign we can indicate the number of MTE codes that we have used. Originally there are 16, but due to the bug that I mentioned before we had to add another tag, so now wi will have to type a 17 in there.
It looks like we can add up to 234 codes, so add as many as you want in the .txt file but keep in mind that the number of codes must be declared in this .lua file, and also keep in mind the bug that I mentioned before.
I think that is all.
sábado, 15 de noviembre de 2014
6 - Adjust the new font
Each hex value corresponds to each character width, so we will need to have this image in front of us so we can see which values corresponds to which letter:
SPACE=05
!=05
"=08
etc etc etc
Just replace the old widths with the new widths, and that is all you need to do. Save the file when you are done.
5 - Edit the font
This is just an example so you can see how the font looks like. The truth is that each character is allocated in a 16 x 12 pixel grid. Inside the EXTRACT folder you will find another folder called FONT. If you go there you will find a little file called "FONT.PRS.font". Now we will have to open this little file using Tile Molester:
Codec: 1bpp planar
Mode: 2-dimensional
Canvas: 2x336 tiles
Now we will find unused characters, so we can replace them with the new Spanish characters needed in our translation.
# = á
$ = é
% = í
& = ó
‘ = ú
[ = Á
\ = É
] = Í
^ = Ó
_ = Ú
’ = ¡
{ = ¿
| = ü
} = ñ
Notice that I used characters that are generally unused in normal texts and dialogues.
When you edit this file using Tile Molester you will notice that the characters are duplicated, but only the first character set is used in the game, so you can ignore the second one.
4 - Extract the contents
01-Extract.bat
I recommend you to put the ISO in the same folder as the .bat files, this will simplify the entire process.
When this extraction is finished we will find two new folders: EXTRACT and INSERT. Obviously the "extract" folder is plenty of files and the "insert" folder is completely empty. The idea is to translate the files little by litte and put them in the "insert" folder when they are ready.
By the way, inside these folders we will find several sub-folders: dialogues, encyclopedia, font, menu and TIM files. In the next chapter we will learn more about the font used in the game.
3 - Prepare the translation tools
Open the file called "LoM-Param.lua". You can open it using any text editor. If you open the file you will see this:
NAME_TABLE_1 = "US-PSX-LegendofMana-01.tbl" -- Name of the first table file (must be in the DIR_TABLES directory
NAME_TABLE_2 = "US-PSX-LegendofMana-02.tbl" -- Name of the second table file (must be in the DIR_TABLES directory
NAME_TABLE_MTE = "US-PSX-LegendofMana-MTE.tbl" -- Name of the table file used for insert dictionary (MTE) (must be in the DIR_TABLES directory)
NB_MTE = 16 -- Number of entries in the dictionary (MTE) - 234 should be the maximum
NEW_EXE_NAME = "LOM-ES.EXE" -- New name of the EXE in the ISO (replace the original SLUS)
PD: I have been told that is not a good idea to change the original name of the .exe file, as this file is probably used by emulators, cheaters, etc, so type the original name instead which is "SLUS_010.13".
2 - Download the translation tools
https://drive.google.com/file/d/0BzlNWlGlBntUajAyS3JfcHFEb1k/view?usp=sharing&resourcekey=0-kv4T-Ck2hAvePl-HkXWh6A
Also, you will need this:
http://static.grumpycoder.net/pixel/lua-interface-win32-light.zip
Extract the "lua interface" in the same folder as the translation tools.
1 - Get the game
- Size: 677.406.576 bytes
- CRC32: 5028946f